
Yoga for TMJ is gaining traction as one of the most versatile solutions to help reduce pain and address the main causes of the condition. The purpose of our article is to help you learn about yoga as a potential treatment method. We will also teach you four different yoga poses that you can try from the comfort of your own home.
Understanding the Basics of TMJ
Before we move onto the various neck stretches for TMJ, it’s important for you to understand the basics of this condition. TMJ, short for temporomandibular joint dysfunction, is a condition characterized by pain and tenderness in the area of the jaw that connects to the skull.
Unfortunately, the causes of TMJ can be quite varied. Some of the most common examples include misalignment of the jaw or teeth, a recent traumatic injury to the area, and teeth grinding. People who regularly chew gum also have an increased chance of suffering from TMJ disorder. For many sufferers, stress is the main cause for their TMJ symptoms.
Fortunately, yoga for TMJ can help address the pain of the condition and reduce the stress that often leads to it. The next section will discuss the various jaw exercises you can do at home and will briefly touch on yoga for teeth grinding.
4 Effective Yoga Poses For TMJ Treatment and Management
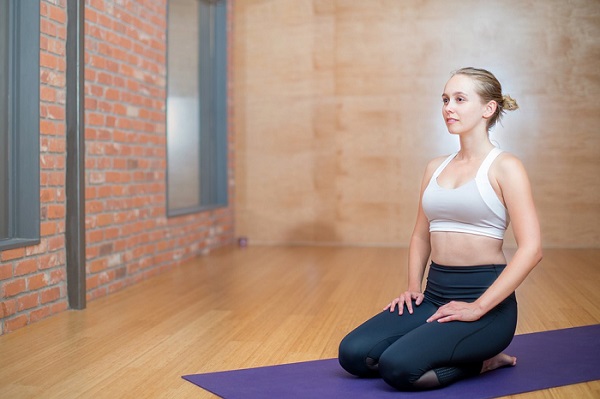
1. Head Tilts
We’re starting our yoga poses with one of the simpler options that is perfect for beginners and experienced users alike. The position is called a head tilt and is designed to help relieve tension in your neck and jaw area. It also has the added benefit of improving your functional range of motion slightly.
To get started, sit with your legs crossed Indian-style on an open and comfortable flat surface. Try to imagine an invisible string holding your head up to improve your sitting posture for the maneuver.
Now, stretch your left hand out to your side and maintain it in a comfortable position. The next step is to gently press your right ear to your right shoulder. If you cannot get it to touch completely, just stretch it as far as you can comfortably. Hold the position for three to five seconds before extending your right hand out and repeating the movement with the other side.
For best results, do two to three sets of this move and try to gradually increase the duration of the stretching postures. Just remember to never force the movement to avoid aggravating your injury.
2. Hand Clasps
This maneuver is designed to help pull your shoulder muscles together and to help release pressure from your neck and jaw area. Start by sitting in a comfortable position on a flat surface. For best results, make sure to use a high-quality yoga mat or a fluffy towel to provide enough cushion and support for you.
The next step is to put your hands behind your back and to try to lace your fingers together. If this is too difficult for you, you can also use a small hand towel to make joining your hands easier. Just remember that the goal is to create a stretch that isn’t painful. However, you should still feel your shoulders and chest being worked slightly.
You’re now ready to try to bring your palms as together as possible and to extend your arms further back behind you. As you do this, focus on your breathing and try to keep your shoulders straight. You should attempt to inflate your chest fully with deep breaths in this position. Hold it for five or so seconds and gently release when you are done.
3. Chin Tucks
While this yoga for TMJ position won’t necessarily treat bruxism, it can still help with some of the symptoms. Chin tucks are also one of the more friendly yoga poses for users who have flexibility issues. This makes it a great choice for arthritis sufferers and the elderly.
To get started, begin by taking a comfortable seated position. You should keep your head at a neutral angle during the beginning of the exercise. Try to focus on your shoulders and spine to make sure you are not slouching or tilting to one side.
Now, take a deep breath in and focus on raising your chest upwards as you fill your lungs with air. You will slowly bring your chin to your chest and hold it there while you are holding that breath in.
After a few seconds, slowly exhale and bring your chin back to its original resting position. Try to complete this pose two or three times in each session. Make sure that you are taking deep breaths and that your posture remains stable throughout the entire maneuver.
4. Eagle Arms
The Eagle Arms pose may look a bit difficult to some. However, it’s actually fairly easy to pull off for individuals with decent flexibility. Start by swinging your left elbow underneath your right.
This next part is where some new users may have difficulty. Attempt to touch either the back of your hands or your palms together. If you can’t quite reach, don’t force it. Just get as close as you can and proceed with the next step.
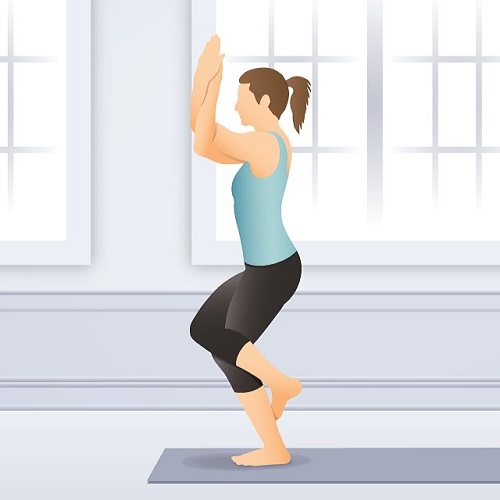
You’re now ready to start lifting your elbows to approximately shoulder height. As you do this, try to gently move your forearms away from your face to start creating a gentle stretch. Now, begin slowly bringing your elbows in towards your chest. This movement should coincide with your breathing and should further stretch your back and shoulder muscles.
Attempt to hold this position for several full breaths before releasing and repeating with the opposite side. Over time, your flexibility should improve and the position will become much more comfortable.
Conclusion
Yoga for TMJ has many great benefits. For starters, it helps reduce stress. This eliminates one of the leading causes of the condition. It also helps to stretch muscles and to restore proper range of motion. If there are any yoga for TMJ positions that you would like to recommend, feel free to tell us about them in the comments area.
Leave a Comment